
In this section :
1 – Settings
In order for automatic closing to be effective, which can be extremely useful for businesses, it is important to grasp the logic behind MacCompta Pro’s closing method.
The principle behind closing is that every account is transferred to or combined with a more general account until the last operating account, Loss & Profit, whose balance represents the net profit of an accounting period.
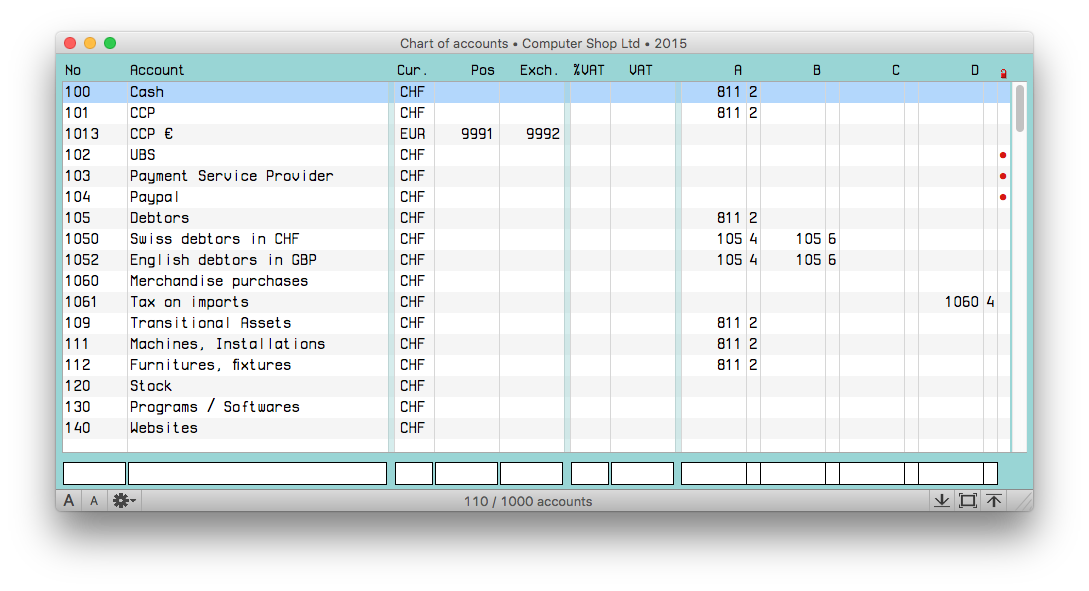
Every account can therefore be automatically transferred to another account using the 4 closing columns which can be found in the chart of accounts. Usually, MacCompta Pro transfers each account following the order in which its number appears in the chart of accounts. However, it is possible to force a transferring order using the second column of the closing plans A, B, C, D. The order of precedence varies from 9 to 1 (i.e. 9 is transferred first, then 8, then 7, etc.).
It is possible to set up to 4 different closing plans which are entirely independent from one another. You could very well choose a single closing plan with different levels of precedence to be done successively.
Below is a sample of a chart of accounts which has 4 entirely independent closing plans:
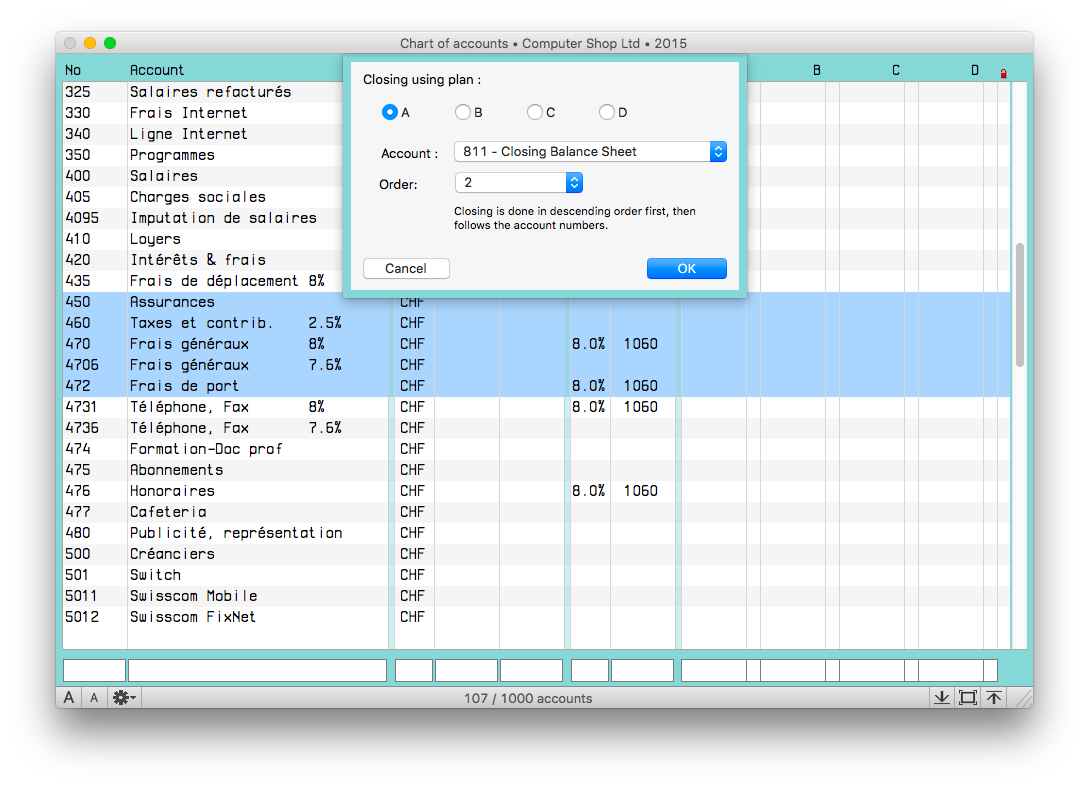
In order to set where you want to send the balance of a group of accounts, select the accounts you want to close in the chart of accounts and go to Edit line > Special > Set closing plan for selected account.
2 – Closing entries
You can close the books in File > Automatic closing.
When automatic closing is launched, the software will use the date, the label (max. 19 characters to which the name of the closed account will be added) and the reference found in the edit line to generate closing transactions.
Transfers are then automatically made in real time.
Created lines will be added at the very end of the ledger and will be marked with the symbol (•) in the automatic closing column represented by the icon (![]() ).
).
In case the document is protected and many levels of access restriction have been enabled, automatic closing cannot be made unless, at the very least, the option Create is selected.
See chapter on password protection
NOTE : Files > Unclose will do exactly the opposite and delete all the entries that were created during automatic closing, i.e. all entries marked with the symbol (•) in the automatic closing column (
).
However, locked entries will not be deleted.