
In this section :
- Overview
- Access privileges dialog
- Changing passwords
- Changing users
- Confidential accounts
- Locking entries
1 – Overview
In MacCompta Pro, you can set access privileges for as many as 6 users. This will protect your document from being viewed or modified by non-authorized people.
To set access restrictions, go to File > Settings and check the Access restriction box to enable it.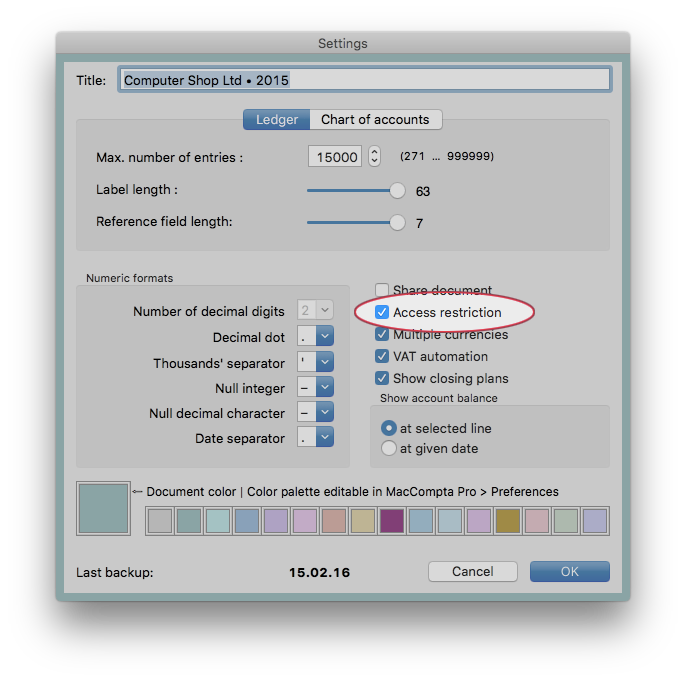
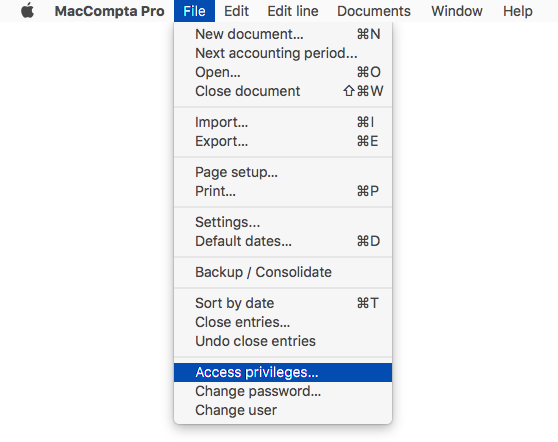
Once Access restriction is enabled, you can set access privileges in File > Access privileges and other settings, such as Change password or Change users will be activated at the end of the File drop down menu.
2 – Access privileges dialog
In this dialog, you can set access privileges for as many as 6 different users.

A combination of the following privileges can be set :
None
No access to the document is granted to the user.
Read
User is solely authorized to view the ledger, the accounts, the chart of accounts and the trial balance. Entries cannot be modified, printed, nor exported.
Write
User is authorized to enter transactions into the ledger, modify non-locked entries, and print. The chart of accounts cannot be modified and automatic closing cannot be performed.
Create
User is authorized to read, make or modify the chart of accounts as well as run automatic closing. Authorizations described under Write are also possible.
Control
User is authorized to modify access privileges and reset passwords. All other privileges also apply.
The Reset boxes allow you to select and click to reset any access privilege to the None setting.
The “Reset” button in the bottom left corner of the dialog box enables you to reset all privileges at one time.
Click on the “OK” button will save all new privileges whereas the Cancel button returns to your old settings.
NOTE : The designation field does not correspond to the password.
By default, passwords are set to “00000” for the first user, “11111” for the second, and so on. Changing the contents of the designation field has no effect on the password itself which can be modified in File > Change password.
If the user with full privileges (i.e. 00000) wants to reset a given user’s password, he must click on the reset button for that particular user.
However, if he wants to change the password, he will have to restart MacCompta Pro and use that user’s default password to enter and then go to File > Change password.
3 – Changing passwords
Passwords can be changed by going to File > Change password. You will be asked to enter your current password before you can set a new one and confirm it in the fields provided (See below).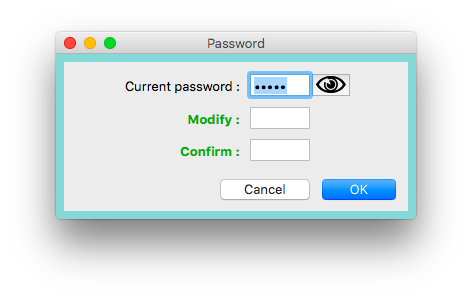
Passwords are limited to 5 alphanumeric characters. They are case-sensitive.
4 -Changing users
To change users go to File > Change user and enter the password preset for that user.
NOTE : You’ll find the name of the current user at the very top of any window in the title bar.
5 – Confidential accounts
In some cases, it may be desirable to prevent certain accounts from being viewed by non-authorized people. In the chart of accounts, you can set any account to be confidential.
After selecting an account in the chart of accounts, go to (Menu) > Edit line > Lock selected account(s) to lock it. This will make it only accessible to users with Create privilege. 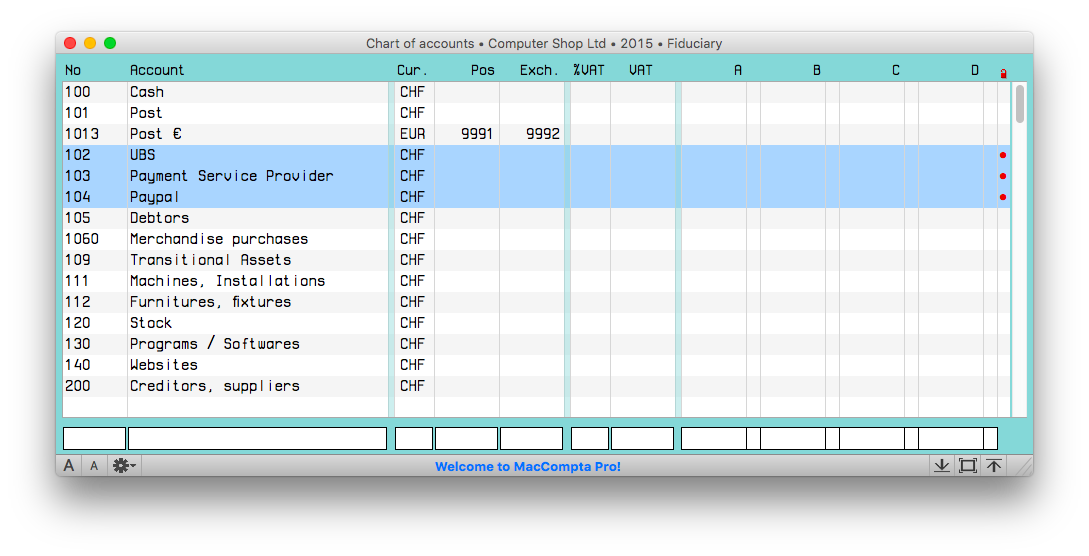
NOTE : Access restriction must be enabled in File > Settings for accounts to be lockable!
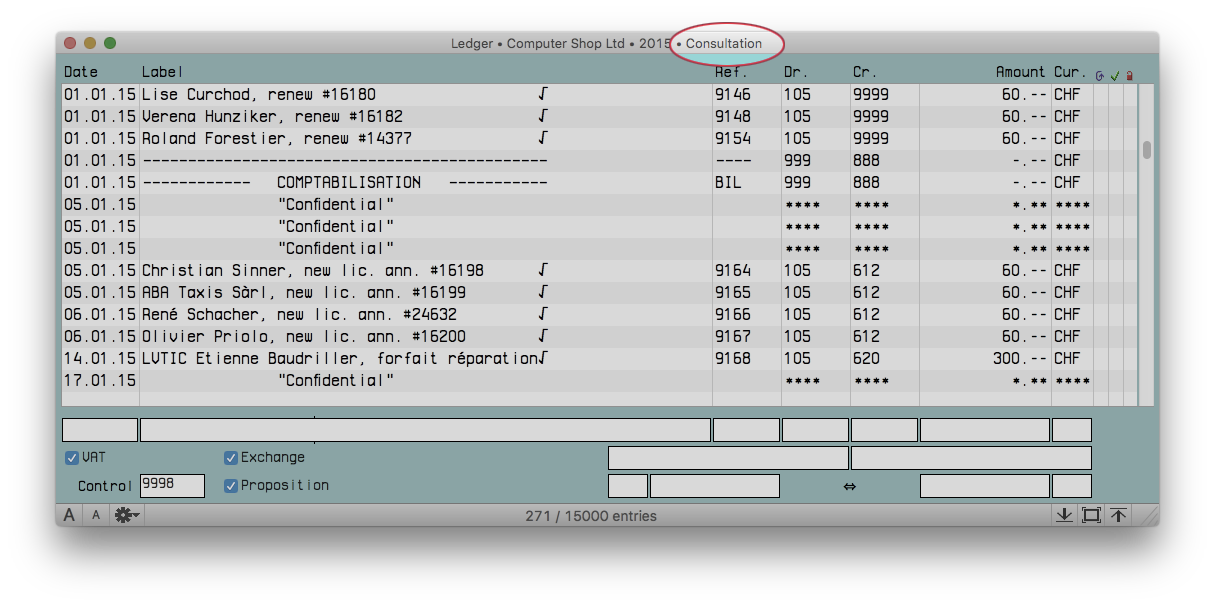
In the chart of accounts shown above, you can see that accounts no 102, 103 and 104 are locked. This means that if any user were to access that document with a privilege set lower than Create, s/he won’t be able to view entries for those accounts.
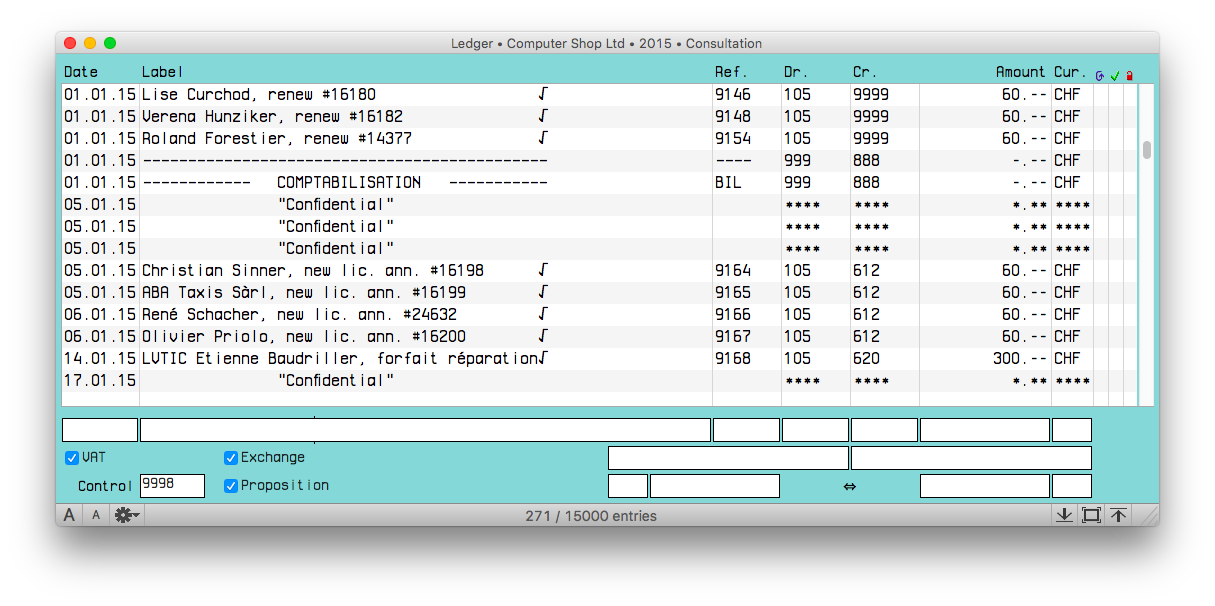
You’ll notice that only the date the transaction was entered is visible for locked accounts and that entry names are replaced by Confidential.
6 – Locking entries
For security reasons, it is possible to lock entries too. This means that people with an access privilege set lower than Create won’t be able to modify them. This also ensures that even without access restriction, the user cannot modify them without unlocking them prior to that.
All you have to do is select any entry in the ledger and go to Edit line > Lock entry. This will lock the selected entry as well as all previous entries and a symbol (•) will show in the “lock column” (![]() ).
).
If the entry was already locked, this will unlock it and it will also unlock all the locked entries which appear after it.
NOTE : Entries that were created due to automatic closing can also be locked; they will be marked as locked and the automatic closing symbol (
) will disappear; they will then lose their “automatic closing entry” status.
NOTE : In order to lock and unlock entries, access privileges must be set to Create or Control.