In this section :
- Overview
- The edit line
- Editing in the ledger
- Account statements (general ledger)
- Balancing accounts
- The periodic balance
- Account balance
1 – Overview
The ledger is where you enter your transactions. You can use it to add, remove, insert, and correct accounting transactions, whereas the trial balance is automatically created from the ledger.
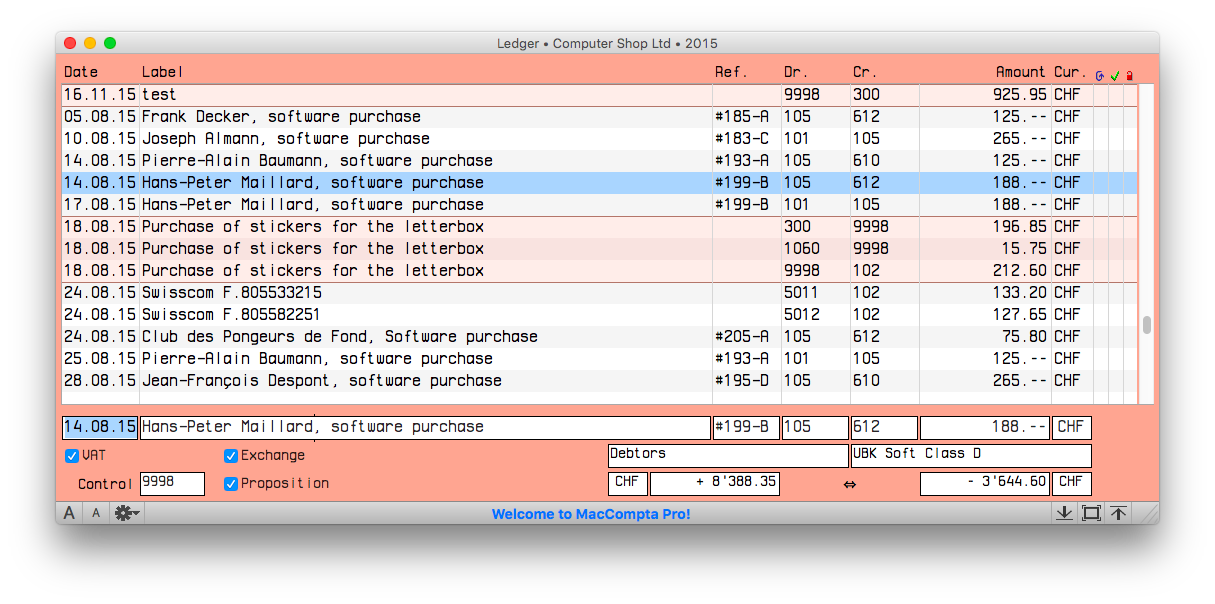
Any action to be made on a transaction, whether new or old, has to be done in the edit line which can be found at the bottom of the ledger window. It is divided into the following fields:
Date
The date appears in alphanumeric format. It must be made up of max. 8 characters and is automatically edited by the software. Non-numeric characters are likely to be interpreted and used as separators.
NOTE : The software will format the date according to the user settings. Default values are those set as today’s date or the default date.
Label
The label field can contain up to 63 characters and there is no predefined format for it.
However, it is important not to exceed 19 characters when doing automatic closing.
See chapter on automatic closing
Ref.
Optional reference in alphanumeric format (max. 7 characters).
Dr., Cr.
Debited and credited account numbers (1 to 4 digits in standard mode, 1 to 9 digits in alphanumeric mode).
Find the corresponding account names below along with their current balance which is updated after validation with the return key.
NOTE : Accounts need to have been created in the chart of accounts beforehand.
Amount
Numeric amount, max. ± 999’999’999.99 for 2 decimal points. If you set it to 3 decimal points in File > Settings the maximum becomes ± 99’999’999.999. The column is automatically formatted by the software according to the settings.
Cur.
Name of currency used for the transaction (0-4 characters ). The currency needs to have been added to the currency chart beforehand.
2 – Using the edit line
You can go from one cell to the other using the Tab key without the software controlling the validity of its contents. Use Shift + Tab to return to the preceding cell.
You can also go to the next cell by pressing the Return key. However, the difference is that the software will control and validate the contents of the cell first. Use Shift + Return (or Tab) to go to the preceding cell.
The edit line is controlled in its entirety before the operation is validated by pressing Cmd + Return, or Ctr + Return on PC. It is only partially controlled when you go from one cell to the other using the Return key.
Here is what is controlled in each field :
| Date | The format. If the cell is blank, the default date will be applied. |
| Label | There must be min. 1 character. |
| Reference | No control as the reference is optional. |
| Debit | The existence of any given account, the presentation of its name and its current balance in corresponding columns. |
| Credit | Same control as for the debit. The account also cannot be the same. |
| Amount | Automatic formatting. |
| Currency | If blank: default currency, otherwise it must be any one of the predefined currencies. |
3 -Editing the ledger
Cut, Copy, Paste, Delete, Add, Insert
Editing an entry is always done in the edit line of the ledger. Every addition, modification or insertion of an entry must be done in the edit line.
The way you edit the ledger is very flexible. The edit line serves, in a sense, as a clipboard specific to the ledger.
In the menu, go to Edit line if you want to make any common editing operations such as cutting, pasting, copying and deleting.
Edit line > Add line will insert the line right after all the existing entries in the ledger, whereas Edit line > Insert line inserts it just before the line selected in the ledger.
Once a transaction is entered in the edit line, you can :
- add it to the ledger using the Enter key (for short keyboards, Cmd + Return (on Mac) and Ctrl + Return (on PC) or using Edit line > Add line.
- insert it before the selected entry in the ledger using the Insert line command.
- modify it by pasting it into the ledger using Paste line which will replace the selected line with the contents of the edit line.
The software will always verify the validity of the date, the existence of accounts and the amounts before entry validation occurs. If there are any inconsistencies, an error message will come up.
Edit line
Edit line commands all have their keyboard shortcut, defined by default and customizable in MacCompta Pro > Preferences.
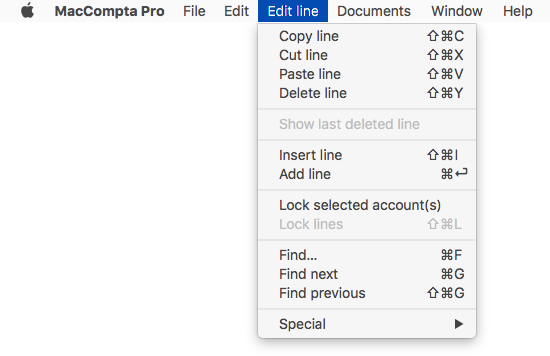
NOTE : Double-clicking on any entry in the ledger will copy it into the edit line.
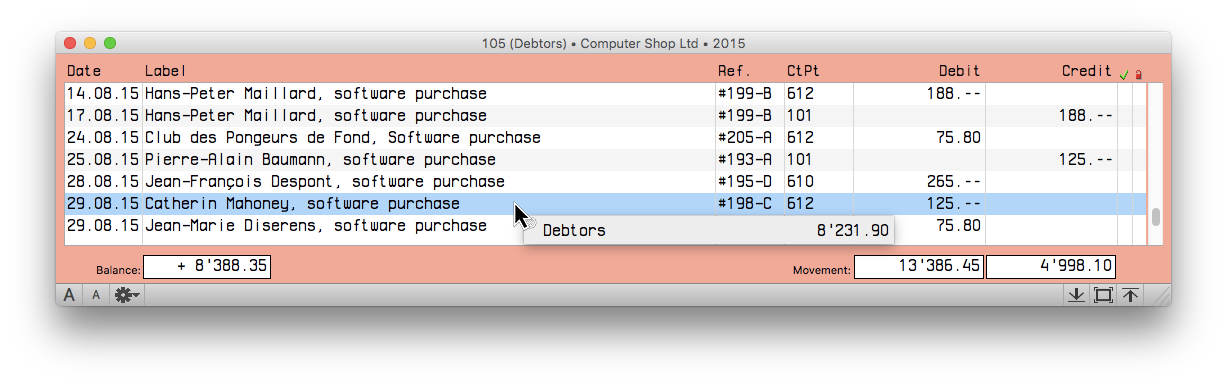
4 – Account statements (general ledger)
The ledger is where you enter transactions. You can add, delete, insert and correct transactions, whereas account statements are automatically created based on the ledger.
To access an account statement, click on Window > Account 1 or Window > Account 2.
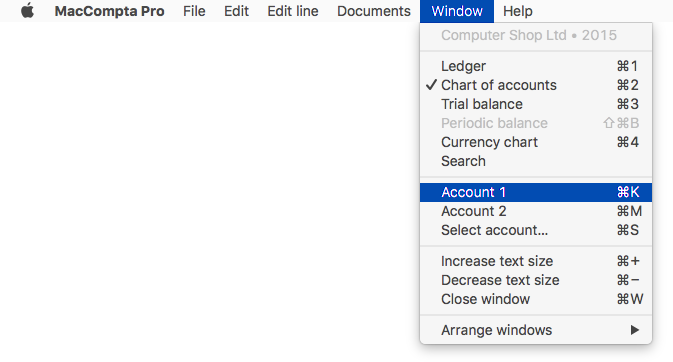
If no account was previously selected for this window, a dialog box will automatically show up and ask you to choose an account.
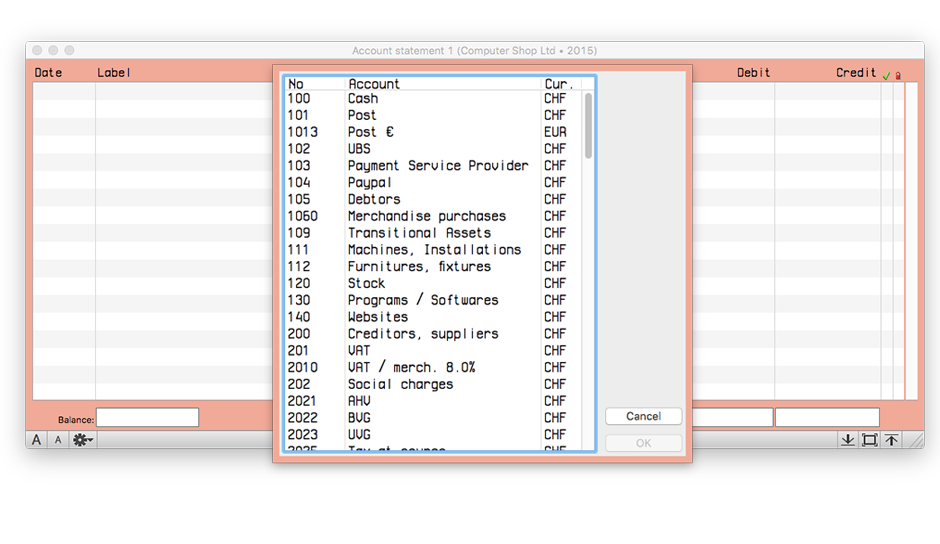
Once you’ve selected an account, the following window will come up.
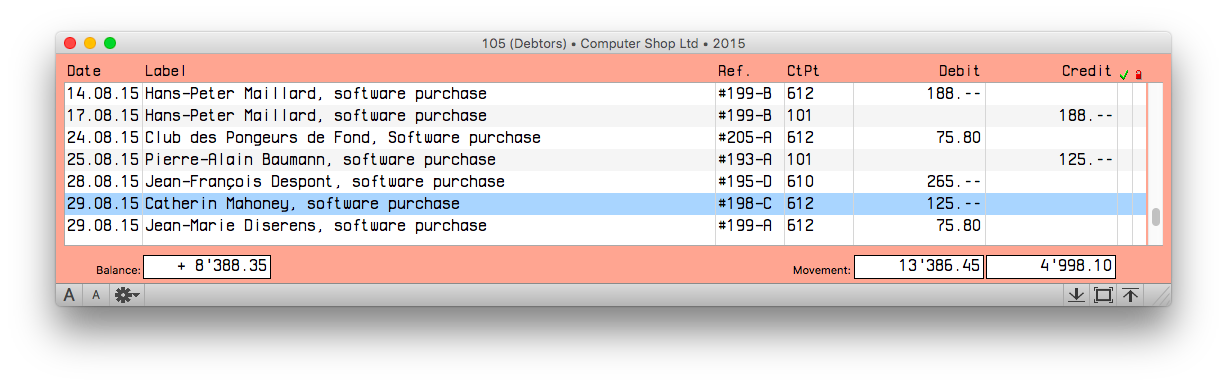
Double-clicking on a line in any account statement will open the ledger and the corresponding entry will be highlighted.
5 – Balancing the accounts
The trial balance makes it possible for you to check the current state of accounts at any given time; their credit/debit totals and their balance. To view it, go to Window > Trial Balance.
The balance is constantly updated by the software.
Double-clicking on a line in the trial balance will open the corresponding account.
6 – The periodic balance
In MacCompta Pro, you can view the balance for a specific period of time which can be set in File > Default date
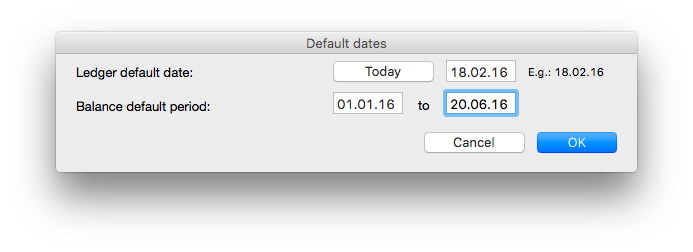
This makes it possible for you to see the same information you would find in the trial balance, but specifically for the period of time you have defined.
7 – Account balance
It is possible to know at any given time the balance of an account at the time a transaction was made in the ledger even though it may not be the last one. In order to do that, click on the account number you want to see the balance of, in the debit or credit column, and hold the Option (ALT) key down.
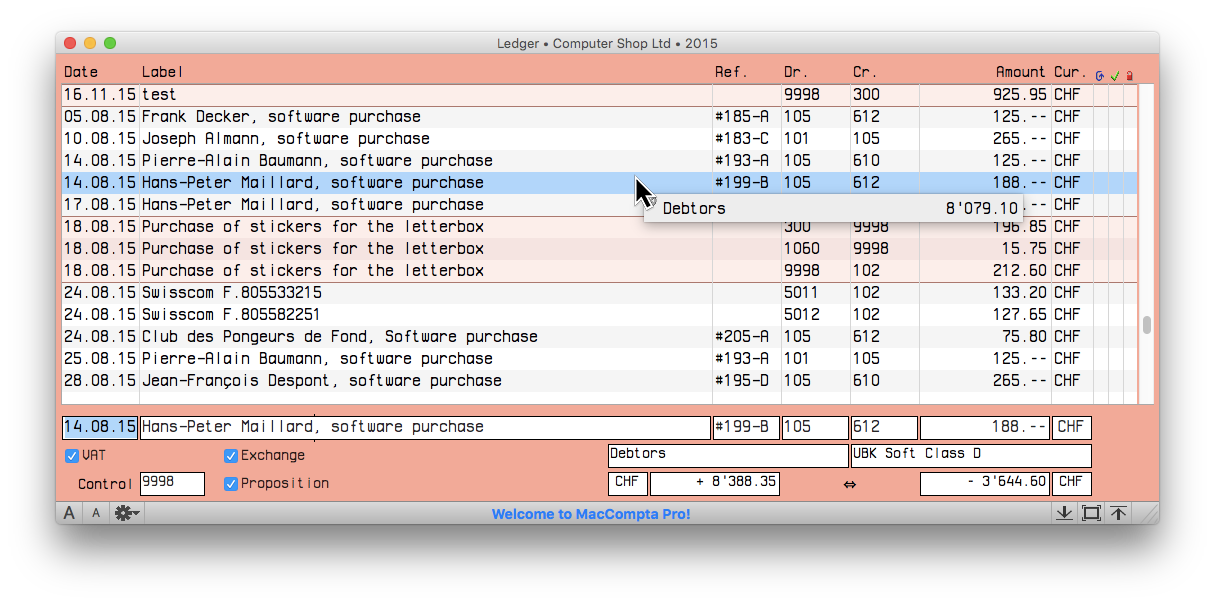
There are two ways of knowing the balance of any given account :
- by taking into account all lines listed prior to the selected entry
- by taking into account all transactions made before or at the date the selected entry was registered.
You can switch to any one of these methods in File > Settings.
See chapter on document settings
The current balance can also be viewed in the account statement by clicking on any entry with the Option (ALT) key pressed down.