In this section :
1 – Overview
In MacCompta, the following documents may be printed:
- the ledger
- accounts statements (separate or grouped)
- the trial balance
- the chart of accounts
- the currency chart
- search results
2 – Page setup
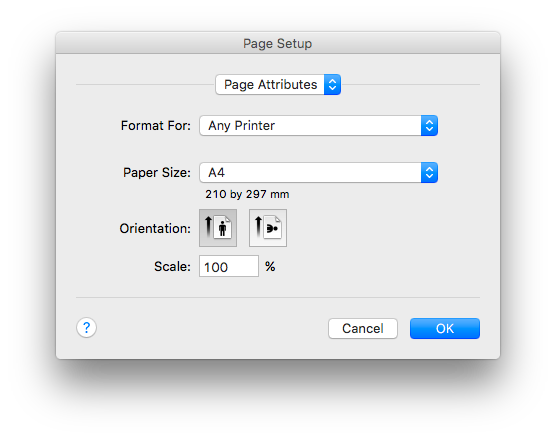
The Page setup dialog lets you set printing options.
Go to File > Page setup to open the dialog.

In Page setup, you can set paper orientation (portrait or landscape) and printing scale, among other things. For all other layout options, please refer to your printer’s manual.
3 – Printing preferences
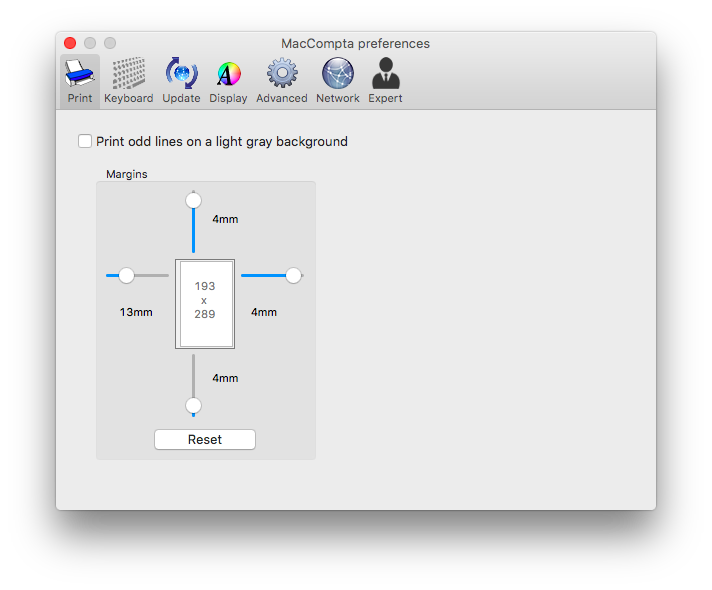
You can set top, bottom, left and right document margins in MacCompta Pro > Preferences by clicking on the Print tab.
Nevertheless, keep in mind that in order for the information to fully appear once printed, reasonable values should be entered.
4 – Print settings
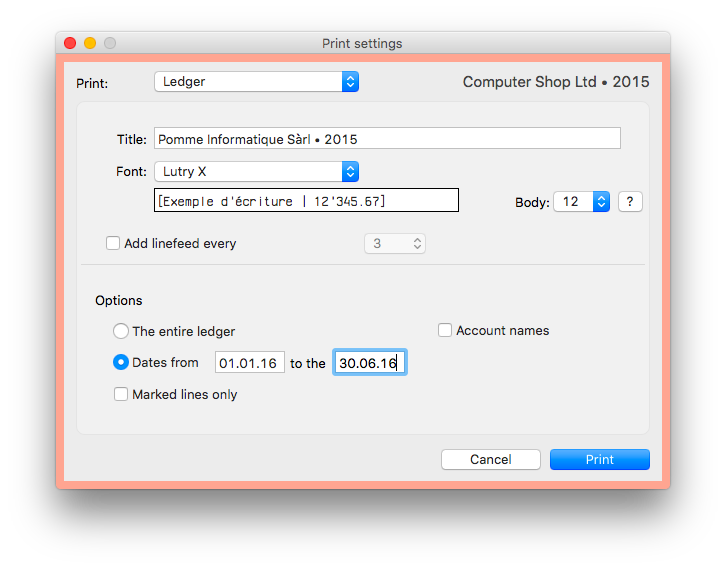
Go to File > Print to open the Print settings. In the print dialog you can choose and configure how you want to print something.
General settings
Title
The title is the text which appears at the top of the printed page. By default, it is the same as the document title.
Font
Font used when printing.
Font size
You can set the font size in which you want the text to be printed. However, when a line doesn’t fit the page width, its font size is automatically reduced in order to fit.
Linefeed
The “Linefeed” function will leave a blank line every five lines.
Printing the ledger
There are different options available when printing the ledger:
Printing the entire ledger
By default, all entries will be printed.
By date
A group of defined entries will be printed.
Only marked entries
Only marked entries will be printed.
By account name
The account name will be printed for each account instead of its number.
Printing account statements
You can print account statements in prefix order, either in a series, or separately.
Numbers
You can select the group of accounts you want to print. By default, 0-9999 in standard mode and 0 to zzzzzzzzz in alphanumeric mode.
Dates
Account entries can be printed for a specific group of dates.
One account per page
This function forces page break after every account. However, when disabled, accounts will print one after the other if they fit on the same page. If an account fits entirely on a single page it will be printed on a separate sheet and if its size exceeds a page, it will start right after the preceding account and continue on a new page.
Account names
The account name will be printed for each account instead of its number.
Balance for each entry
The balance for each entry is printed in a supplementary extra column.
Printing the chart of accounts
The chart of accounts can only be printed in its entirety.
Printing the currency chart
The currency chart can only be printed in its entirety.
Printing the trial balance
The trial balance can only be printed in its entirety.
5 – Print dialog
When everything is configured, click on “Print“. The print dialog will come up.
NOTE : Page selection in the print dialog will be ignored by the software.
If you only want to print a page range, first click on PDF preview where you will be able to choose the range of pages to print.

